In this article, we will show with a concrete example how to realize, using the Reach Technology SLCD43 module,
a graphical interface for colour touch-screen display which is able to control, by mean of the Telit GM862 modem,
all the peripherals of the SX-PY board.
The goal of this example i sto realize a simple user interface to be uploaded on a touch-screen display SLCD43 by Reach Technology
which communicates, by mean of a serial link, with a Python script running on a Telit GM862-PY modem.
In other words, we will build a simple touch-screen system which can: drive two relays, send an SMS with a just a touch on the display,
show the status of two digital inputs and show the text of the SMS messages received on the GSM number of the SIM card used in the Telit modem.
The program controlling the system is divided in two parts.
The first part, uploaded on the display SLCD43 memory, deals with the visualization of the user interface and for each command,
such as a button clicking, it sends on the serial port the command which is interpreted and executed by the second part of program
developed in Python and running on the Telit modem.
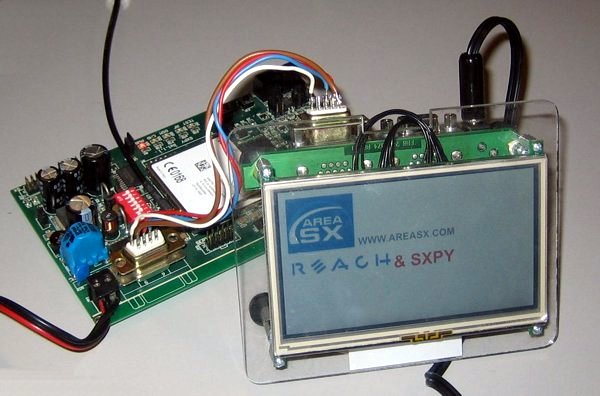
The following hardware has been used for writing this article:
- A development kit for SXPY
- A development kit of Reach Technology
- A null modem serial cable, with DB9 male – male connector
The Reach Technology SLCD43 display
The SLCD module by Reach Technology is a controller for LCD color display (from 4’’ up to 10’’) with touch-screen properties,
fully controllable through a simple serial or USB port (An introduction to the Reach TouchScreeen LCD display with serial control).
It is equipped with its own CPU and mamory, and also an easy programming language with macro,
so the display by Reach Technology can work as a stand alone device.
This way, the embedded devise connected to display is completely relieved from the task of managing the graphical interface.
Part of the operation of the system developed here relies just on the macro programming available on the display by Reach.
With a Windows PC and a suitable software you can upload in display memory images, fonts and macros which then can be use to design the graphical interface.
To upload files on the SLCD43 module, just follow this procedure:
STEP 1
Download, form the last section at the end of this article, the following files:
BMPload.zip and MACRO_SXPY-SLCD43.zip
Extract the files on your PC.
The first file contains the software needed to upload contents into the memory of module SLCD43.
The second file contains the macro programs and the images, developed for this example, which compose the user interface running on the Reach display.
STEP 2
Power on the module SLCD43 with the adapter 220V-5V included in the kit and connect with a serial or USB link
(in this second case the external power supply is not needed) the display to a PC.
STEP 3
Extract the file BMPload.zip and launch the BMPload software on the Windows PC.
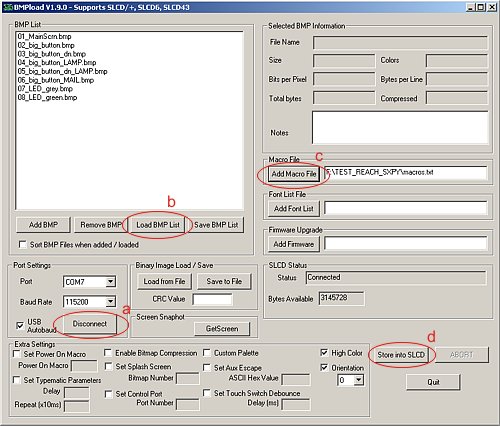
(screenshot 1)
Select a serial port where the SLCD43 display was previously connected (item A in the screenshot 1).
STEP 3
Extract the file MACRO_SXPY-SLCD43.zip.
Using the BMPload software, click on the "Load BMP list" button (item B in the screenshot 1)
The demo.lst file contains the list of the image files (files BMP) which have to be uploaded in the Reach module.
01_MainScrn.bmp
02_big_button.bmp
03_big_button_dn.bmp
04_big_button_LAMP.bmp
05_big_button_dn_LAMP.bmp
06_big_button_MAIL.bmp
07_LED_grey.bmp
08_LED_green.bmp
STEP 4
Again using the BMPload software, click on "Add Macro File" button (item C in the screenshot 1) and select the macros.txt file.
The macros.txt file contains some instructions collected together in small functions (macro) which the display can run also in stand alone mode.
STEP 5
Click on the "Store in SLCD" button (item D in the screenshot 1) and wait for the files upload completion.
Python program for the modem Telit GM862
The program (developed in Python and available as source cose for frre download at the end of this article - PYTHON_SXPY-SLCD43.zip) has the following task: executing the serial commands received form the display module, to managing the GPIO lines available on the SX-PY board, sending and receiving SMS.
The program source code, before being compiled, has to be configured by setting: the service center number of the used SIM card Mobile Operator; the GSM number of the message addressee; the message text.
The variables, which can be freely modified, are:
SERVICE_CENTER="+393359607000"  #Service Center TIM

#SERVICE_CENTER="+393492000200" #Service Center VODAFONE

SMS_TEST_MSG = "Prova dalla SXPY e il display SLCD RACH" #SMS Message Text

SMS_TEST_NUM = "+39347800000" #Addressee GSM number for SMS test
Once completed the three variables setup, you can go on with Python program compiling
(if needed, just follow the instructions explained in the article available at this link: How to compile Python scripts for the Telit module).
When compiling has been completed, you will have the SLCD43.pyo file which has to be upload in modem memory together with the timers.pyo module
(you can find it in the zip file previously downloaded).
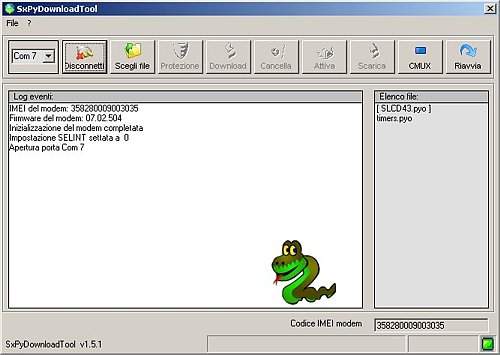
To upload the file SLCD43.pyo and timers.pyo files in the Telit modem memory,
just follow the instructions explained in the article available at this link: How to use the SX-PY board.
Once the Python program upload into the modem memory is completed, we can connect the SX-PY serial port called “DCE”,
using a null-modem (crossed) with male-male connector), to the serial port called “AUX P2” of the SLCD43 kit by Reach
and the we can supply power to the two boards.
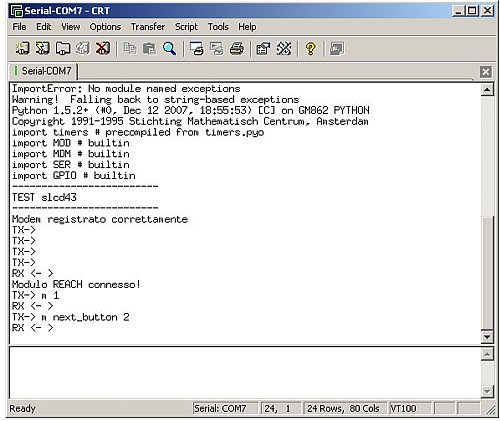
The correct operation of the Python script may be controller using the serial console (baud 115200bps)
which is active on the SX-PY board debug serial port called "SERIAL DEBUG".
Operation
At start up, the Python script running in the GM862 Telit memory executes modem initialization and it waits for registration to the GSM network.
Once the modem is registered, the script initializes the communication with the SLCD43 display by sending on the serial port the "\r" type until it receives back the ">" type as a reply.
After system initializations, the Python script enters a continuous cycle where it reads serial commands received form the display and executes the requested performances.
On the display you can have confirmation of the correct initialization of the Python program when the “Next” button is shown on the first page.

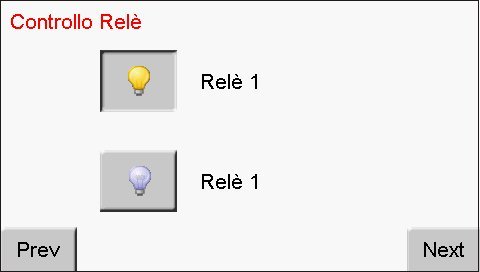
Clicking on the “Next” button, we enter in the first page with the functions which allow controlling the two relays available on the EX-PY board.
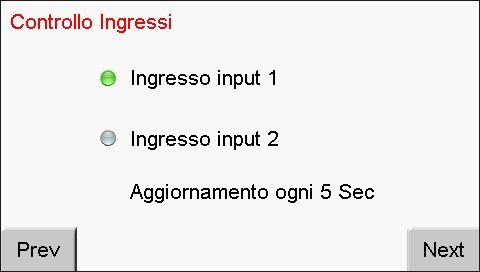
With another click on the “Next” button, we enter in a page showing the status of the two input lines available on the SX-PY board.
This page is automatically updated by the Python script every 5 seconds.
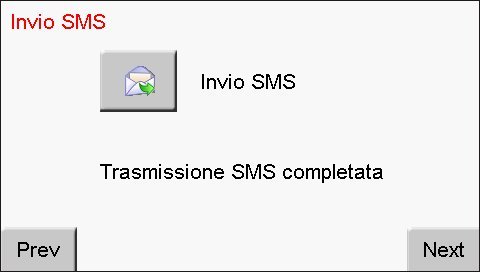
The next page shows a single button which make the Python script send an SMS.
The message text and the destination number of the this test SMS may vary according to the values of the following variables:
SMS_TEST_NUM="..."

SMS_TEST_MSG="..."
which have been previously set in the Python source codeSLCD43.py.
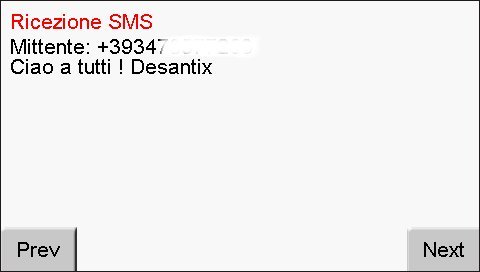
Last page shows sender GSM number and text of an eventual SMS received on the SIM card used in the modem.
The display page is autuomatically updated by the Python program as soon ans the GSM modem receives a new SMS.
Useful Links
Telit Official websitewww.telit.com
Download
 Program for SLCD Reach modulesBMPload.zip Program for SLCD Reach modulesBMPload.zip
Macro and images for SLCD43 moduleMACRO_SXPY-SLCD43.zip
Python program for TELIT modemPYTHON_SXPY-SLCD43.zip
Segnala questo articolo:
Tags: - Python - Touch Screen -
|


 Articles


